The new NAS on the block
Notice - Migrated from legacy site - some formatting may be incorrect.
In my time labbing, I’ve been fortunate to find cracking deals on the compute and network components of my lab, but never had to address storage hosts, until now. This blog post documents the parts, problems and events of the build of my first dedicated storage box.
The main goal of producing the new storage box was to fit several 3.5 inch lumps of spinning rust in a smaller volume case for shared bulk storage for my VMware Cluster. I needed the host to be small in size, as I have limited room left inside my rack to hold the server.
Components
I did some research online, and picked out the following components:
\ CPU - Core i3-4130 - 3.4GHz - I picked up this CPU from CEX (a shop in the UK where used hardware is sold), for around £35. This CPU gives me 2 cores and 4 threads, which should be plenty for a purely storage system.
-
RAM - 2 DIMMS of 4GB ECC DDR3 - This was spare RAM that I had in the lab from upgrading my R210ii. For a low perf bulk storage, I wasn’t too fussed about only having 8GB of RAM.
-
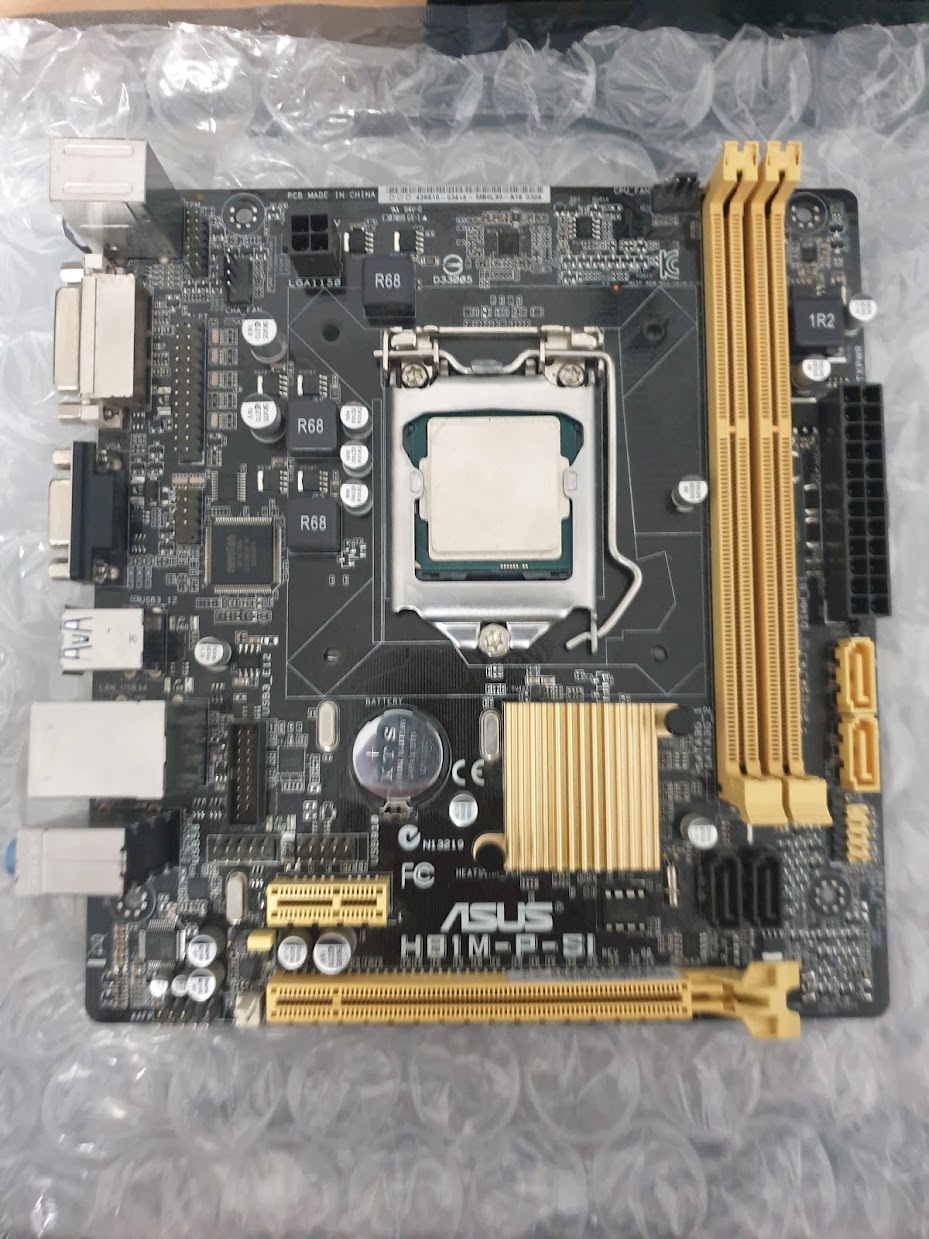
MOTHERBOARD – ASUS H81M-P-SI – Boy is this a weird board. It’s a mini DTX motherboard, which is similar in size to an ITX, but is a little taller to accommodate two PCIe slots (one g2x1, and one g3x16). This allowed my build to have both a discrete Network card and HBA. The board has two SATA 3, and two SATA 6, so I can add SATA boot drives or SSD’s for cache in the future. It has two DDR3 DIMM slots to fit up to 16GB of ram in a Dual Channel config.
-
HBA - Dell H200i - This HBA (Host Bus Adapter) provides 8 SAS/SATA ports, at SATA 6GB/s speeds. These are used to connect to the capacity drives of my NAS. This card was flashed into IT mode when I received it, so I haven’t shown the process of how to do this in this guide but there are several highly detailed guides out there if you have a little google-fu.
-
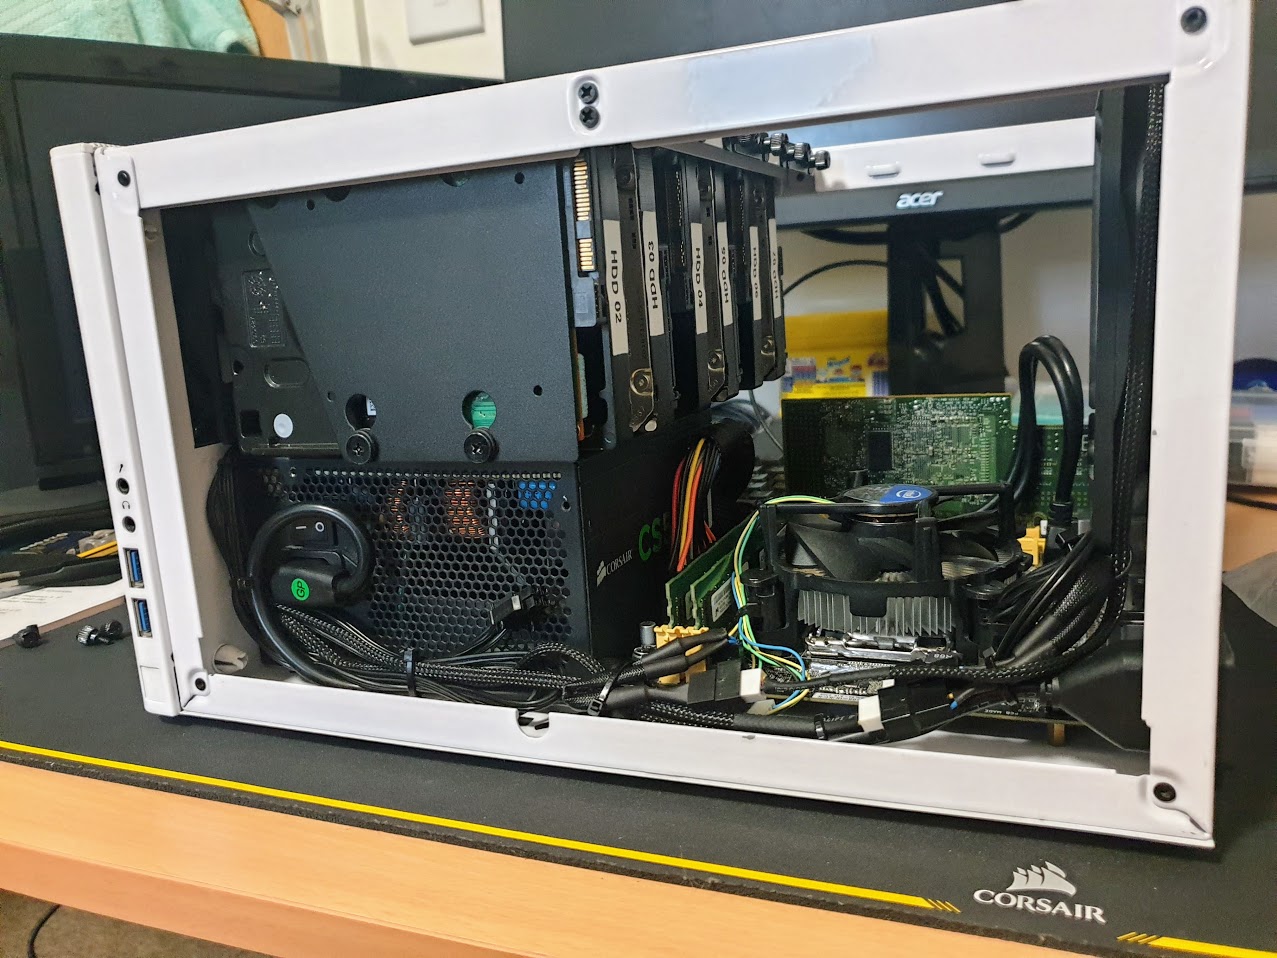
Case – Fractal Design Node304 - This case from fractal design allows me to fit in 6 3.5 in drives to provide the bulk storage. On top of this I think I have enough room in the case to pack in a couple of 2.5-inch drives for either SSD caches or boot drives. This case has a pair of 80mm fans in front of the drive cages, and a large 140mm fan at the rear on exhaust to help keep the system cool.
-
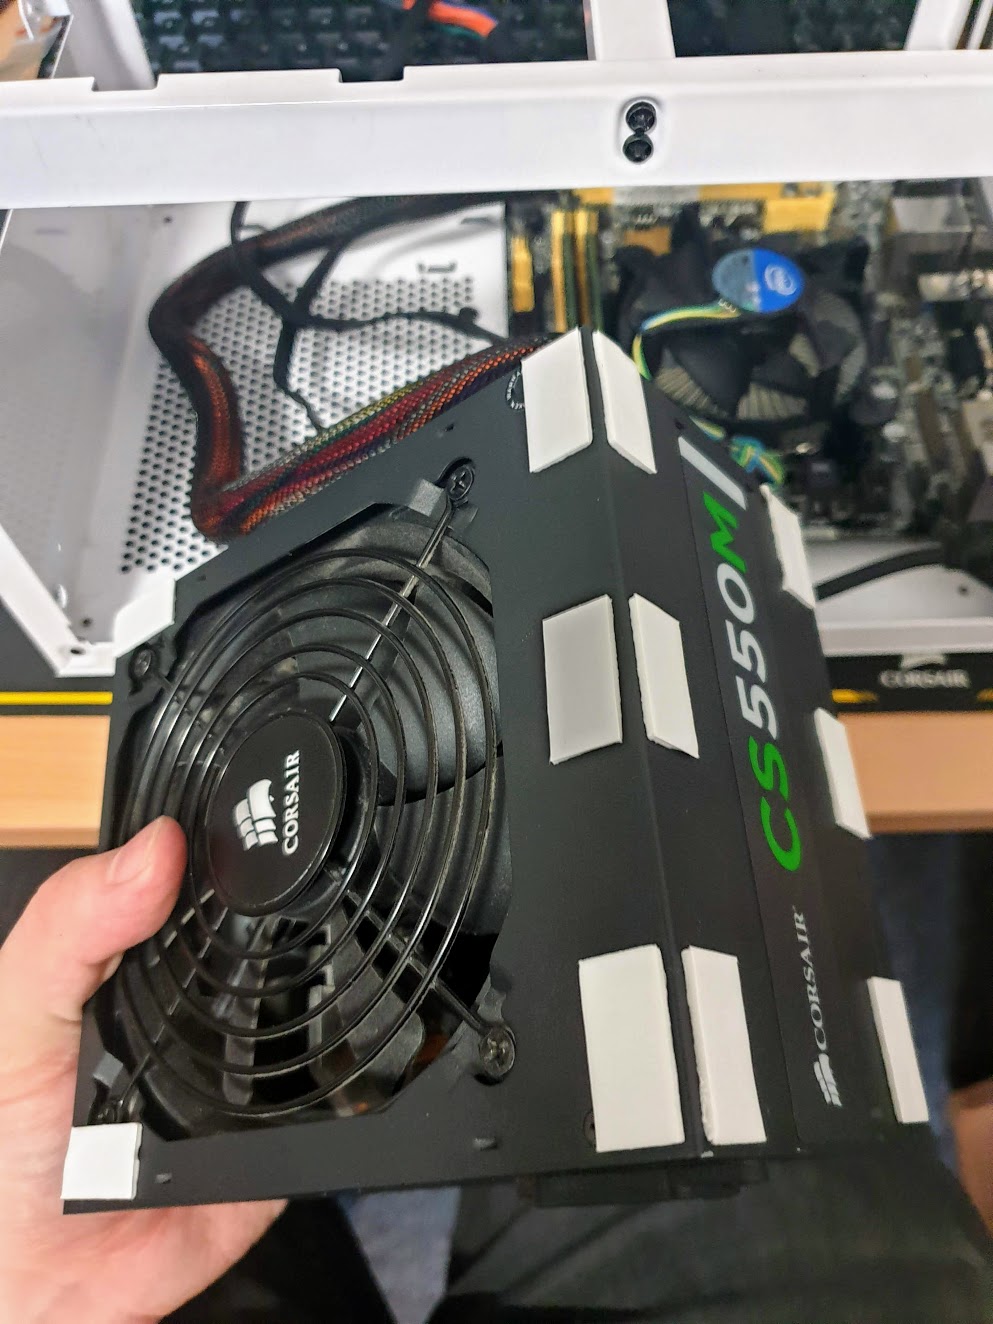
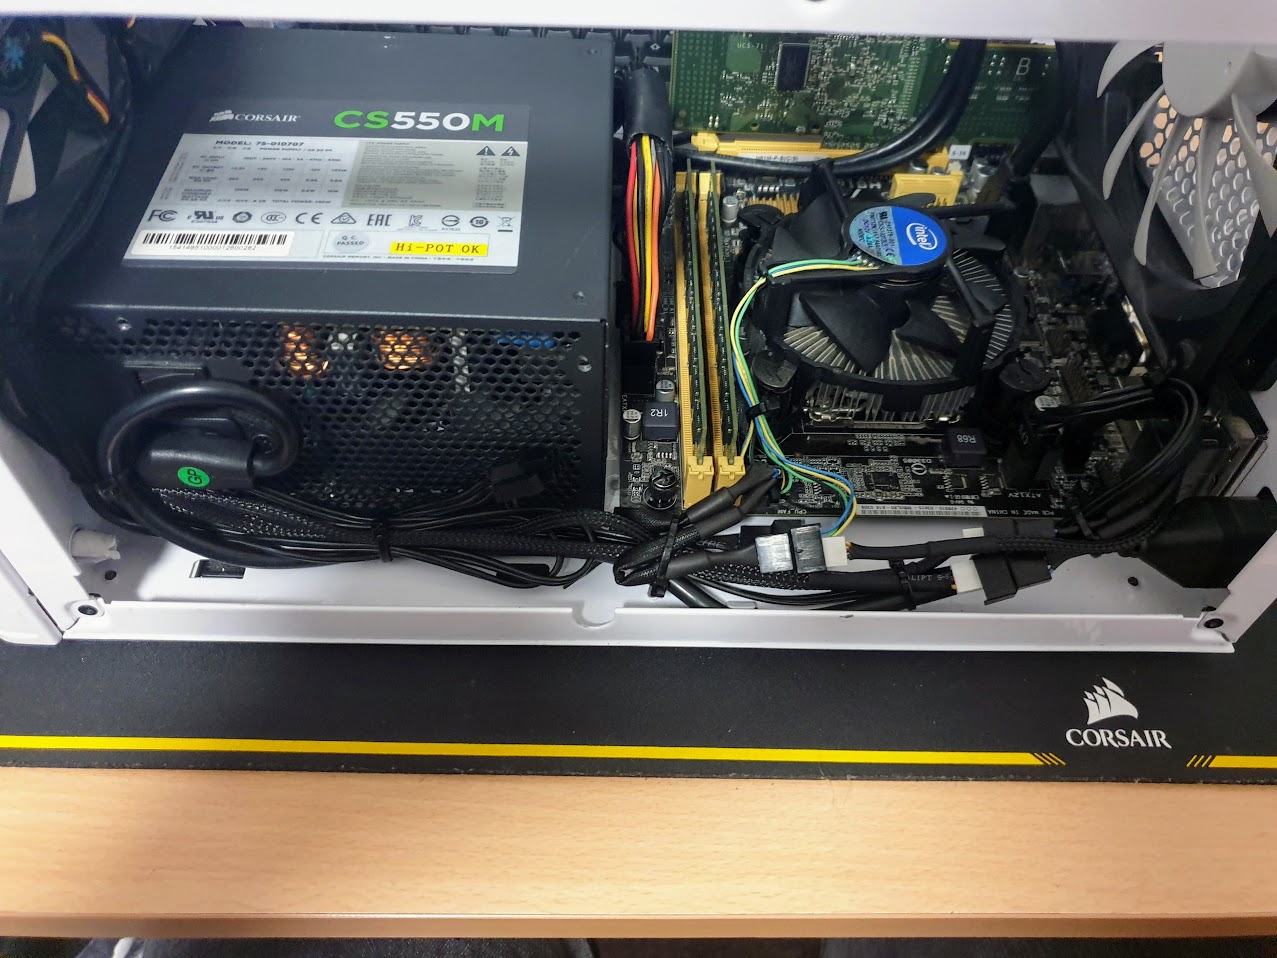
PSU – Corsair CS550M – I picked up this PSU used off eBay at a great price. The PSU was missing SATA cables initially; however, I customized some spares I had to allow me to power all the SATA devices present in the system.
-
HDD’s – Seagate Constellation ES.2 2TB 7200RPM – These were a lucky low best offer off eBay (I picked up 8 of them as they were going for so cheap). The power on hours are relatively low, and they aren’t showing smart errors, so they should do for slow storage. As these are SAS drives, they have to be used with a SAS HBA.
-
NIC – Generic 1Gbe card - I added a second Network card to the build to improve the bandwidth that the system can provide to my hosts. I don’t have a PCIe bracket that fits this NIC, so I am planning on getting an Intel I350 NIC to replace it.
Build
The first part of building this system was an initial test of the core system components. I unpacked the motherboard, and checked the socket was free from bent pins and that there was no visible damage to any of the board. Having checked , I then installed the CPU into the Socket, and applied thermal paste to the CPU.
With the CPU in, I attached the CPU cooler, connected up the cooler fan and inserted the two DIMM’s of RAM. Having done this I then set up the system outside of the case on the cardboard box the motherboard arrived in, with a PSU, Monitor and Keyboard to check that the system reached BIOS.
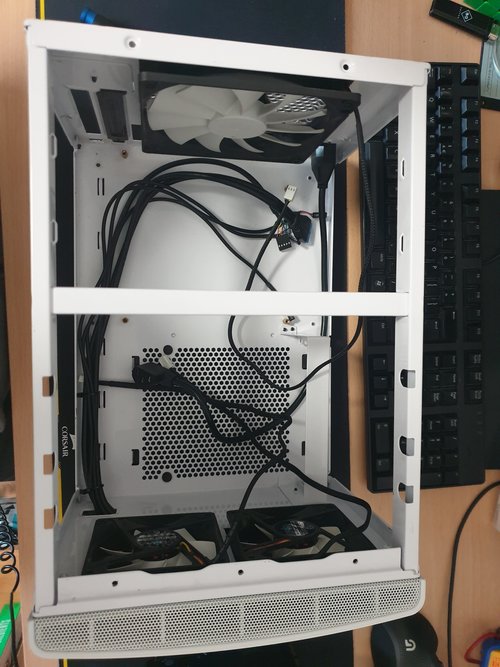
With BIOS working, it was time to start prepping the case for the system. In this build I was using a Node 304 from Fractal Design, which met all my critera. I picked this one up from eBay, along with a PSU bundled in. The first task in this case was to give it a thourgh strip down and clean off as it arrived with a fine but dense dust layer on it. To clean it off I removed the fans, front plate and all dust filers, and gave them all a once over.
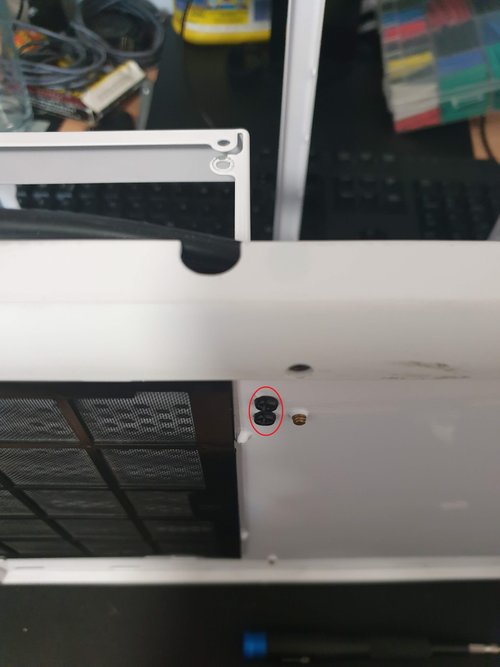
Once the case was clean it was time to mount the motherboard on the pre-installed standoffs in the case. When I came to do this I found an issue. Whilst the Node 304 supports DTX boards, it does have sufficent space between the standoffs and the beginning of the PSU bracket to support the H81M-P-SI. To get around this I had to remove four screws, as shown below circled in red.
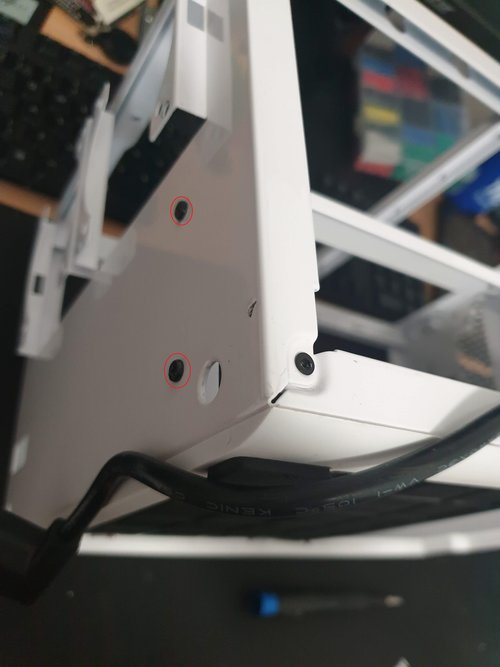
With the offending PSU bracket and screws removed, I was able to mount the motherboard to the case standoffs without any issues. In the photo below the issue with PSU bracket clearance is shown, with the holes to secure the bracket being below the edge of the board.

Now with the issue of mounting the motherboard sorted, the PSU was next to be tacked, and having removed the correct hardware for holding it, I knew this would end up being dodgey. In the future I plan to get a grouding wire screwed in from the PSU's bare metal to a standoff for the motherboard but for the time being it will have to do. The problem was overcome via an excesive number of sticky foam pad on each face of the psu that contacts the case normaly, to try and anchor the PSU in as good as possible. Note the 5mm or so gap between the motherboard and PSU now.
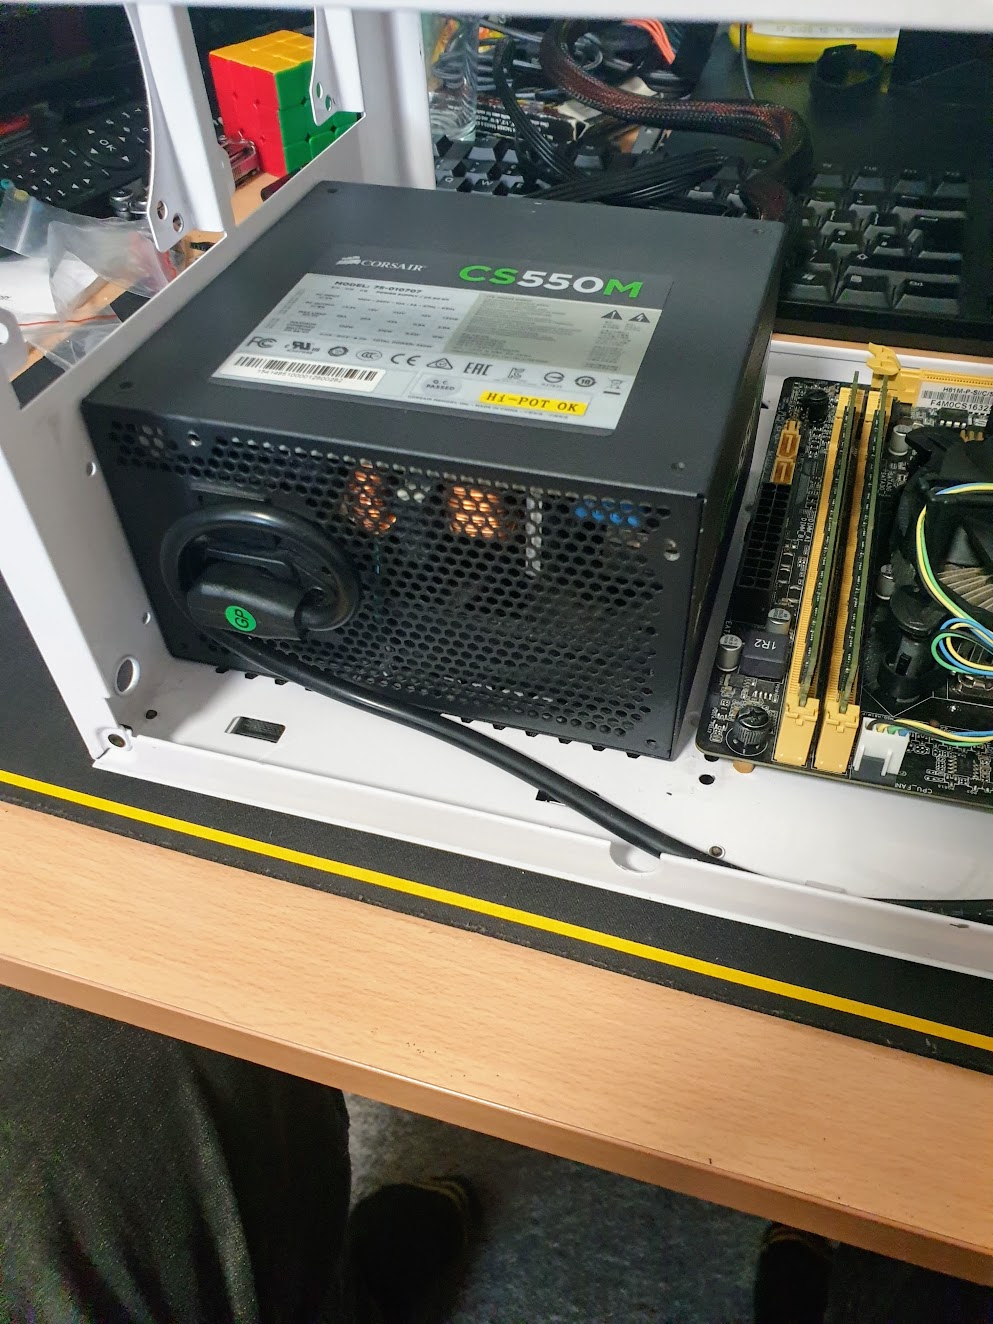
The only issue with this mounting technique is that removal of the PSU in the future will be a rather challenging tast. Good luck future me.
Then I reinstalled the chassis fans to the motherboard via a splitter. The EPS 12V cable was also routed between the PSU and front fans, out of the way of the drive cages to maximise airflow.
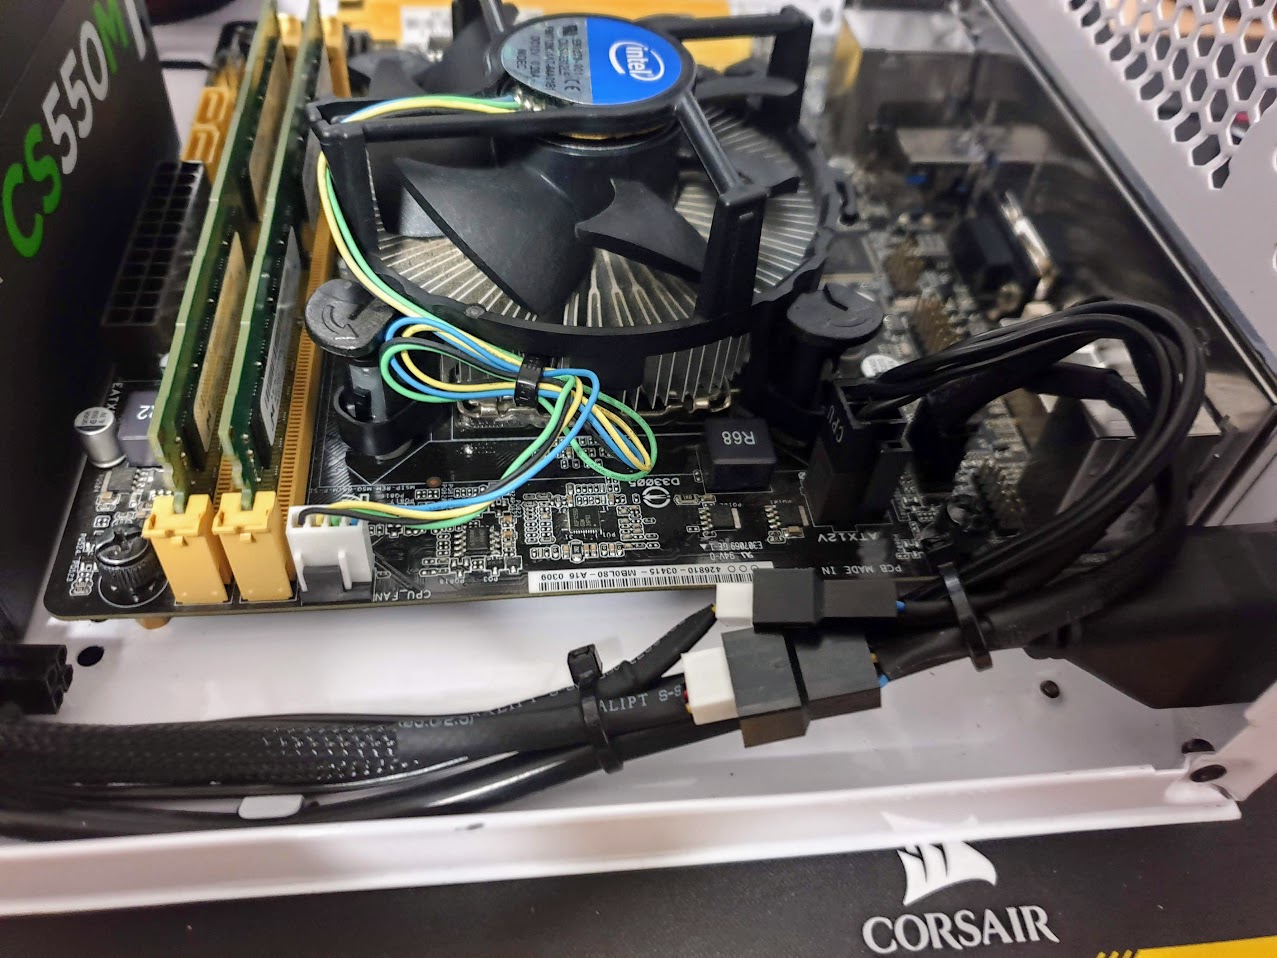
With the top of the boards cabling cleared up I then attached the ATX 24 pin to the board, cable typing the rest of its length down to the chassis.
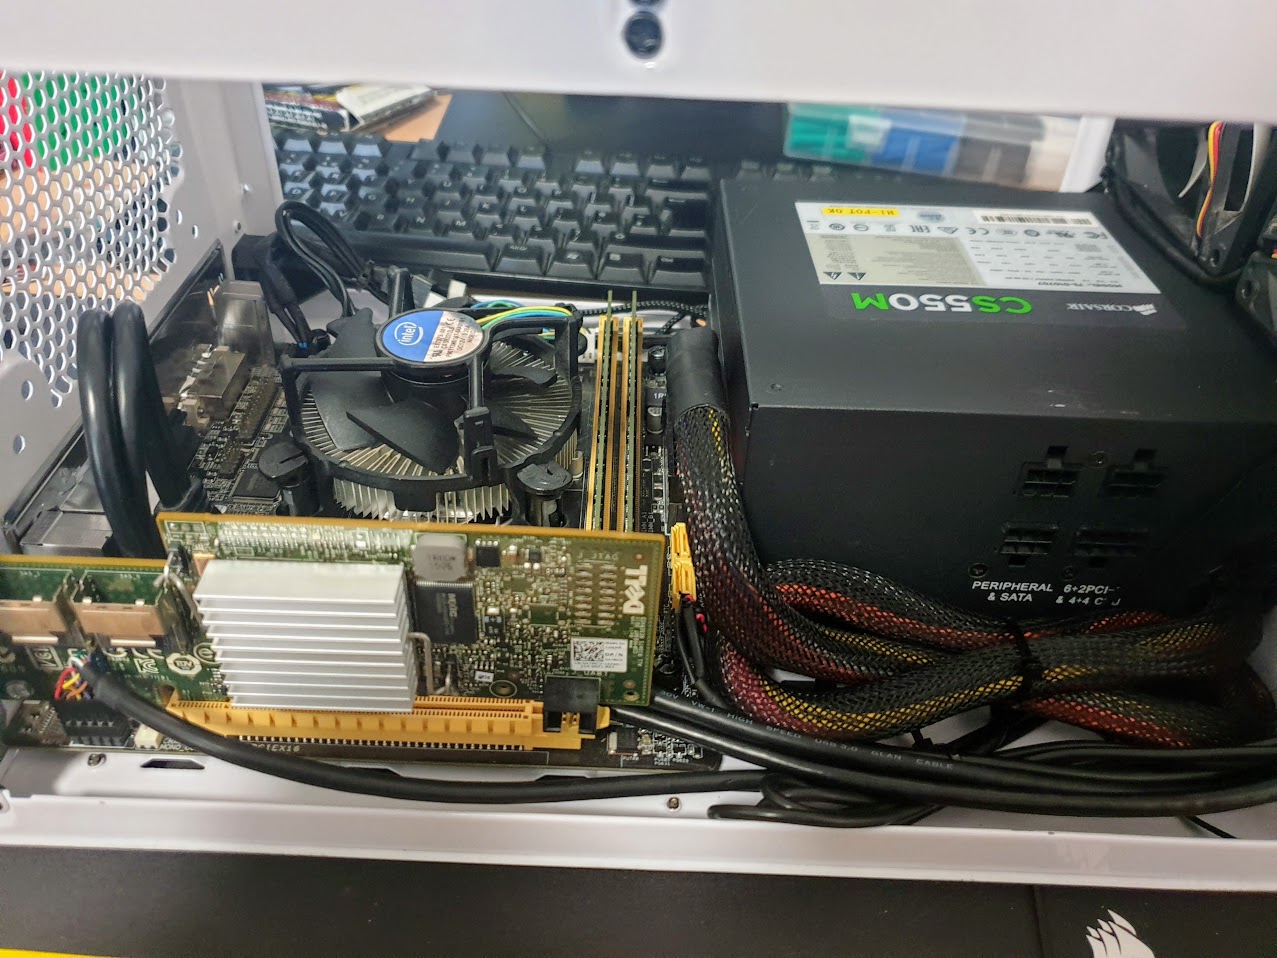
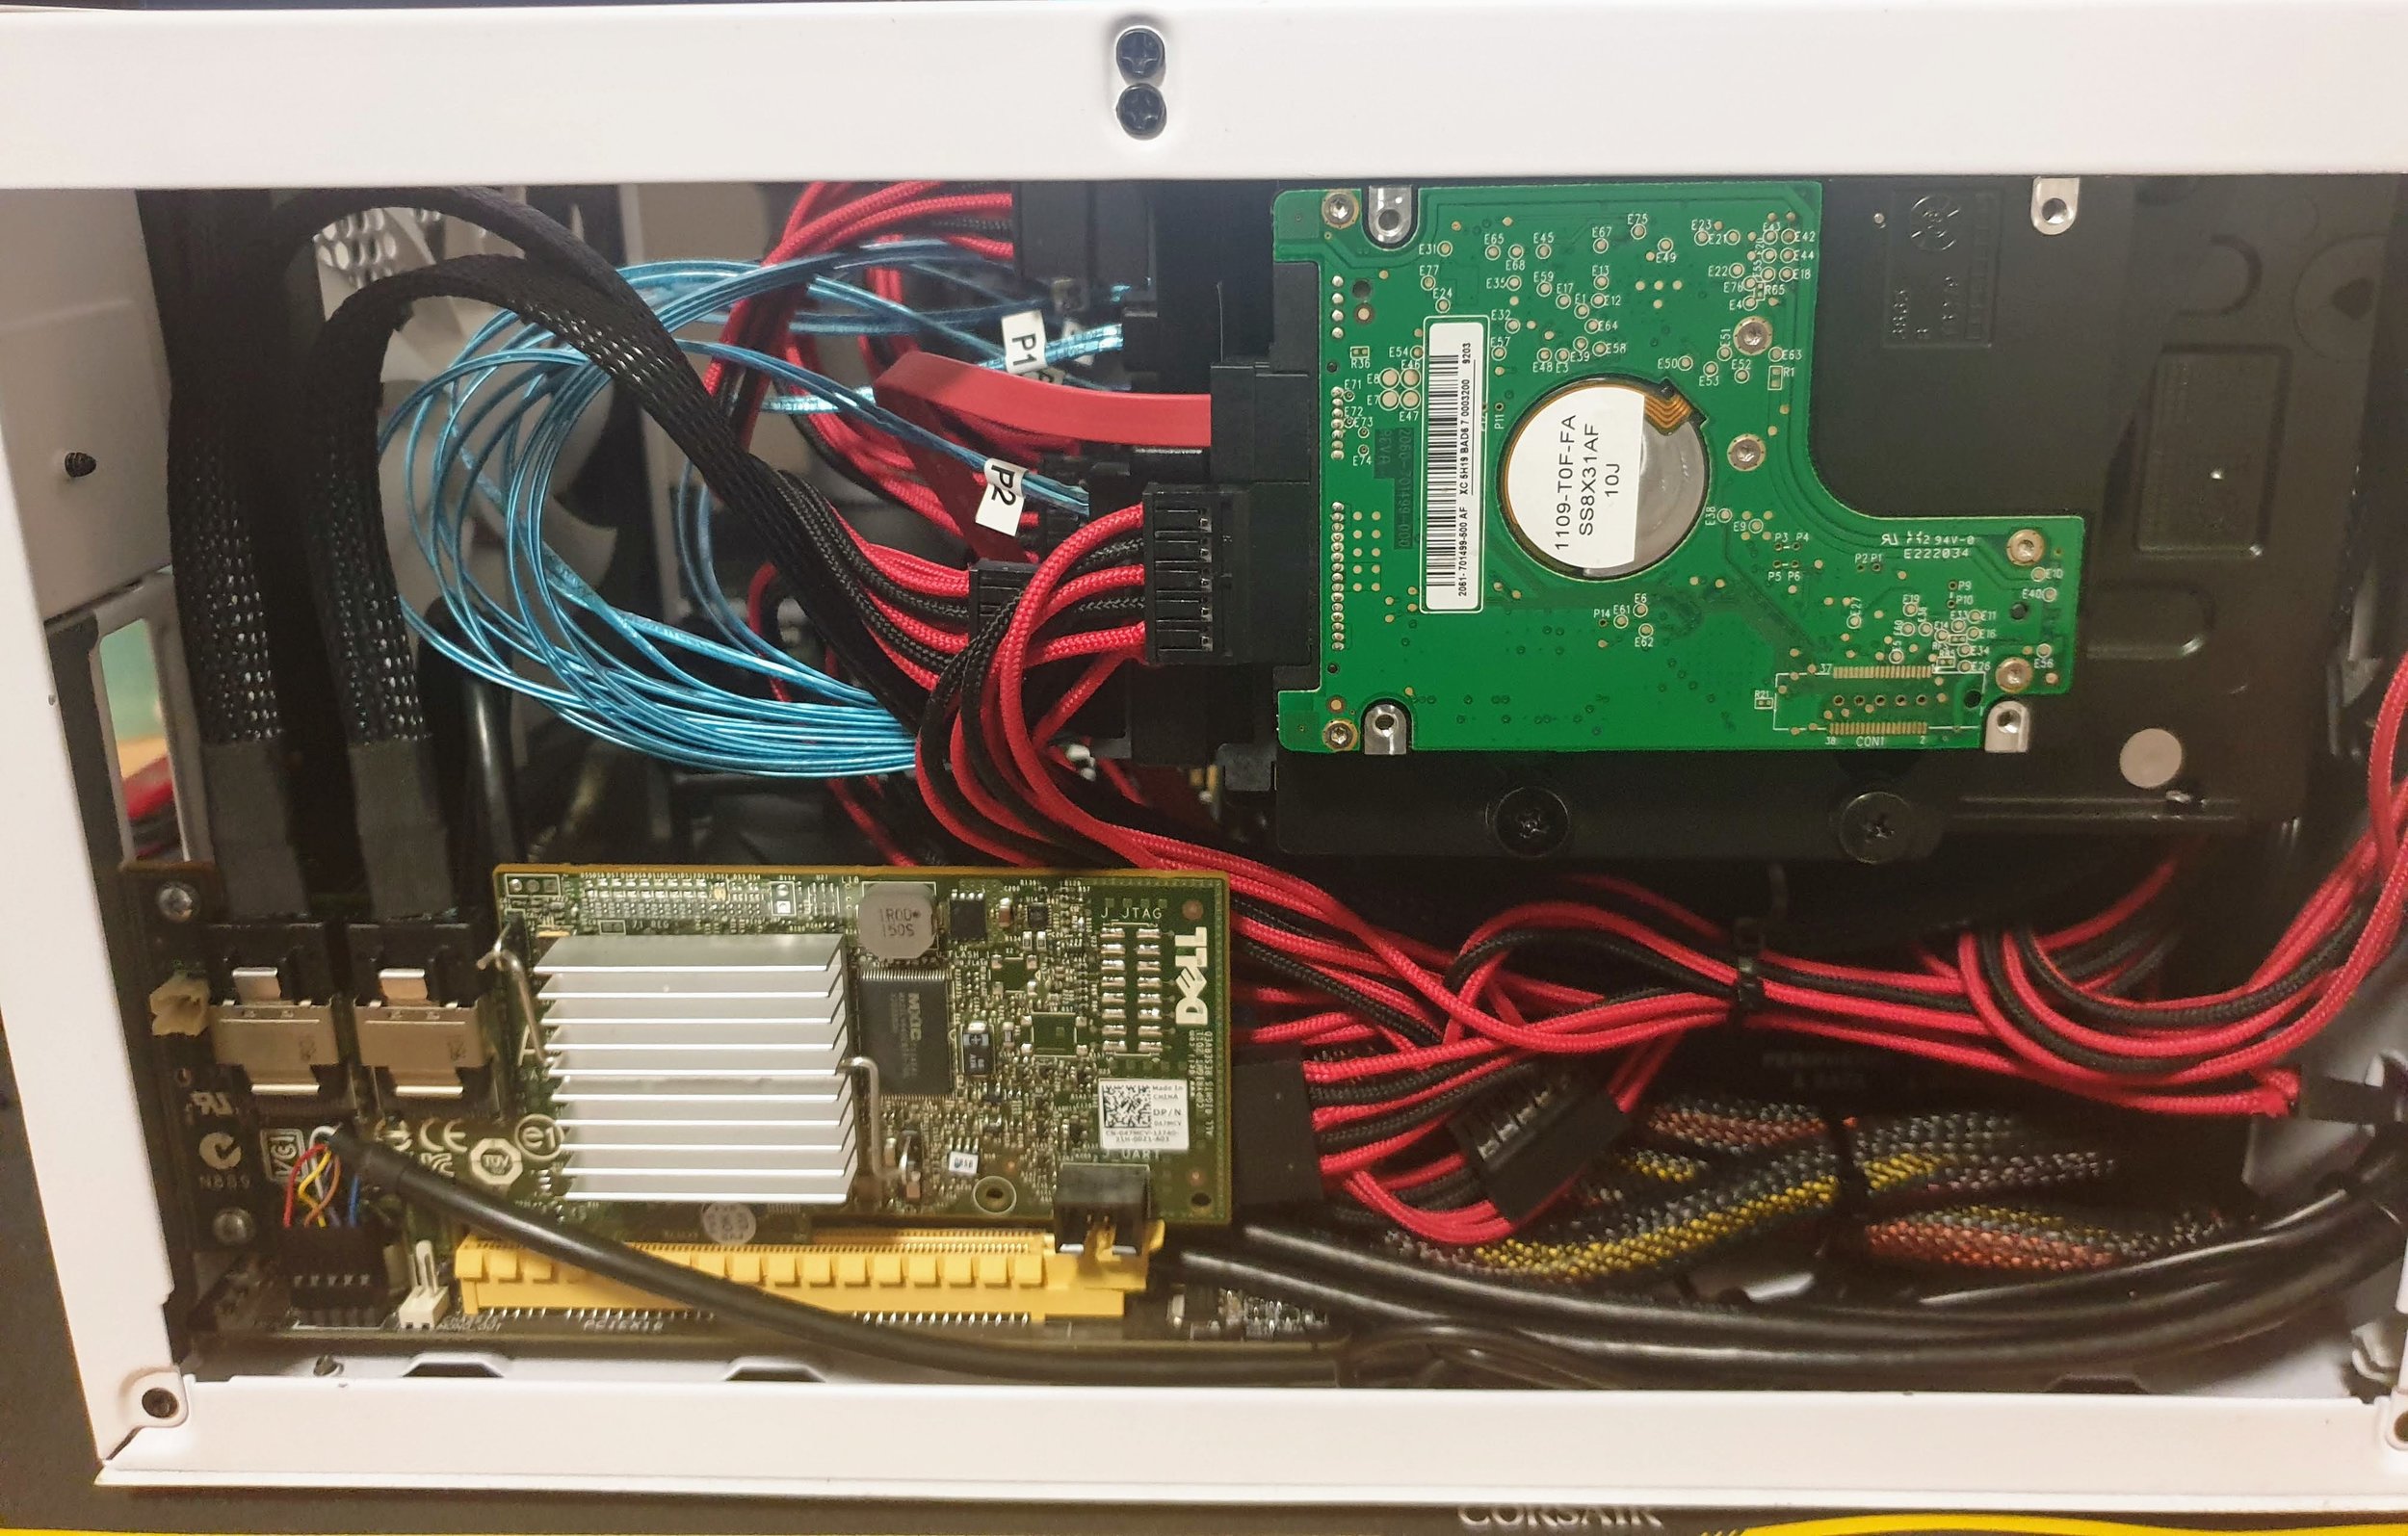
The H200 HBA card was installed next, along with the USB 3.0 front pannel connector and HD audio.
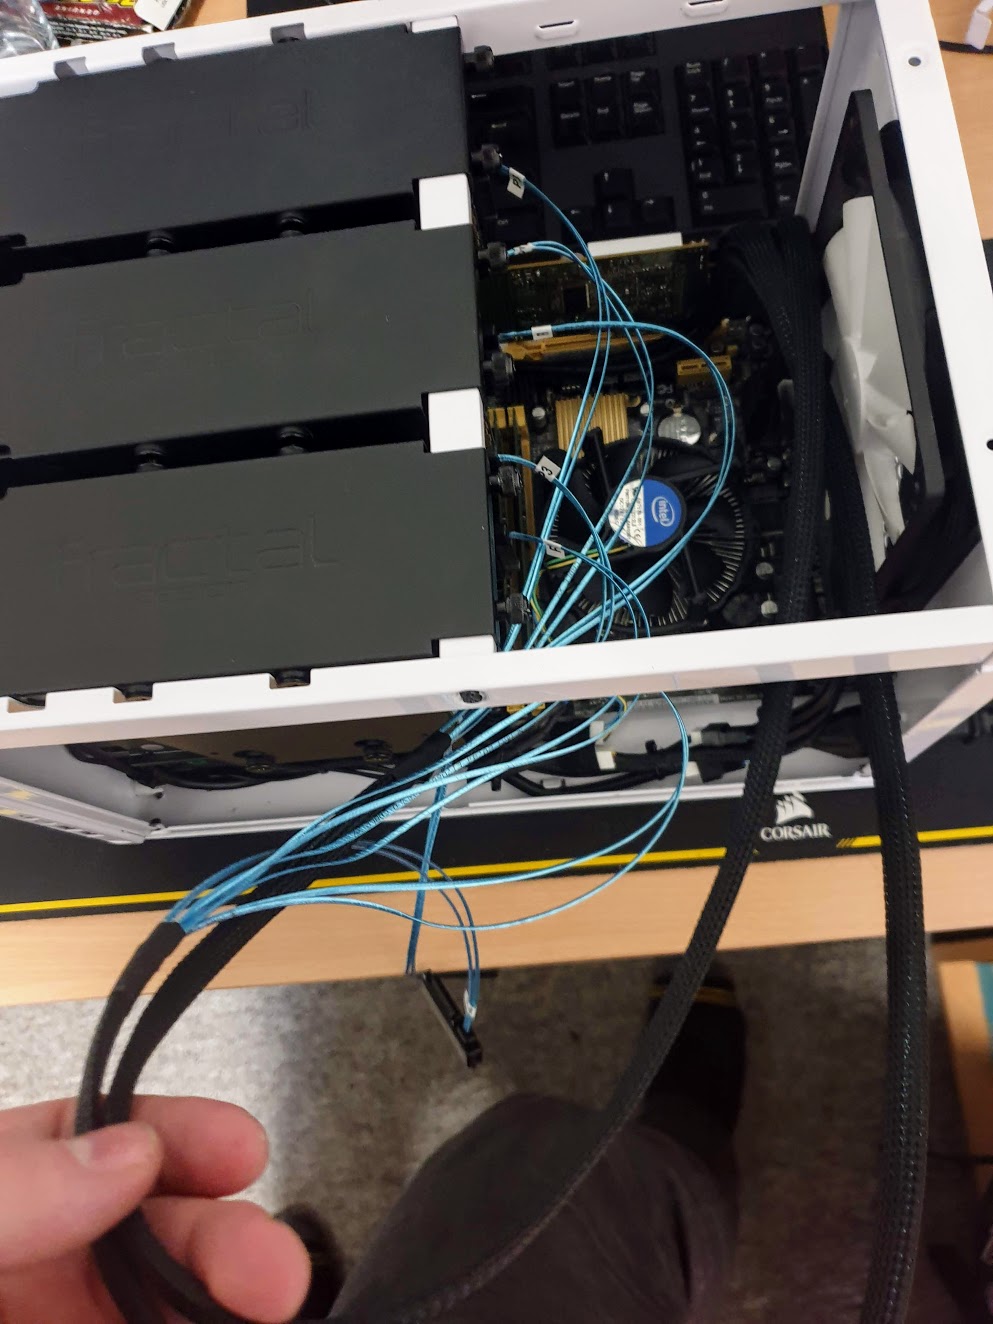
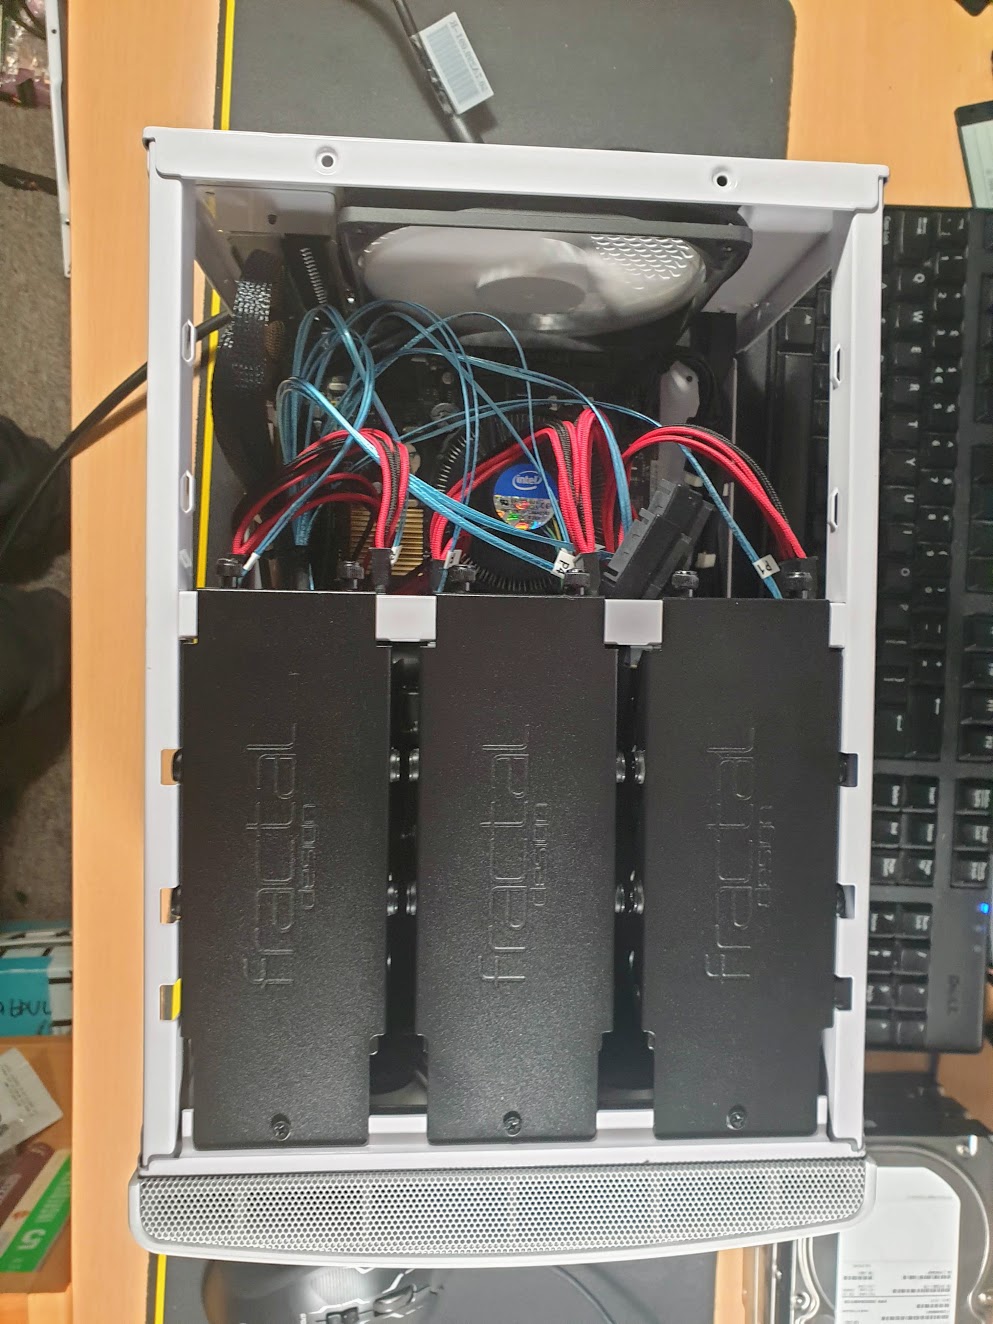
6 drives, 24 grommets and 33 screws. Hard drive mounting is a tedious task. The cages in the node 304 are dense, but a pain to mount to due to the layout forcing you to hold a drive to the inside of the C shaped bracket.
With the drives installed into the case I then attached the SAS breakout cables to the drives.
Having installed all the capacity drives, I then realized that I needed a place to install my OS, in this case I started out testing Windows stoarge spaces. Luckily one of my flatmates gave me a 160gb laptop hdd which let me get it up and running, but I plan to change out soon.
The recommened way to mount laptop hard drives - sticky foam pads.
Results
I was considering running FreeNAS, yet the lack of ECC RAM in the system stopped me. I'm still on the hunt for a more performant OS & system to use on my array.
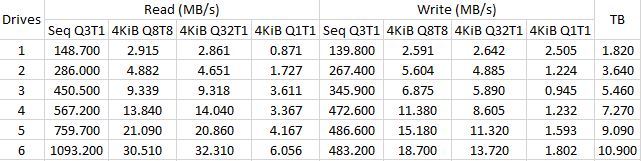
With storage spaces set for testing I then created both simple and mirror arrays with a number of drives. I obtained the following scores from within CyrstalDiskMark.
Simple array results
Mirror array results Where there is a - 2 or a - 3 there was a choice for the number of parity disks to be used.
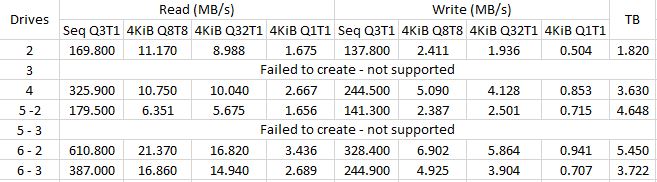
Where there is a - 2 or a - 3 there was a choice for the number of parity disks to be used.
Within a simple array, strong scaling was shown with sequential reads, with writes initially also scaling, but dropping off at around 480 MB/s. This level of performance was never reached in a mirror array. The hard drives struggled in less linear, smaller size tasks as expected, but for bulk storage and backup this ought to be less of an issue. The mirror arrays results were most impressive with 6 drives with two as parity, however this only provided the equivelant performance as 4 drives in a simple array for read tasks. For write tasks the best scoring sequential Q3T1 result from a mirror array was 6.9 MB/s, using 6 drives, with two as parity, which was equivelant to three drives under a simple array.
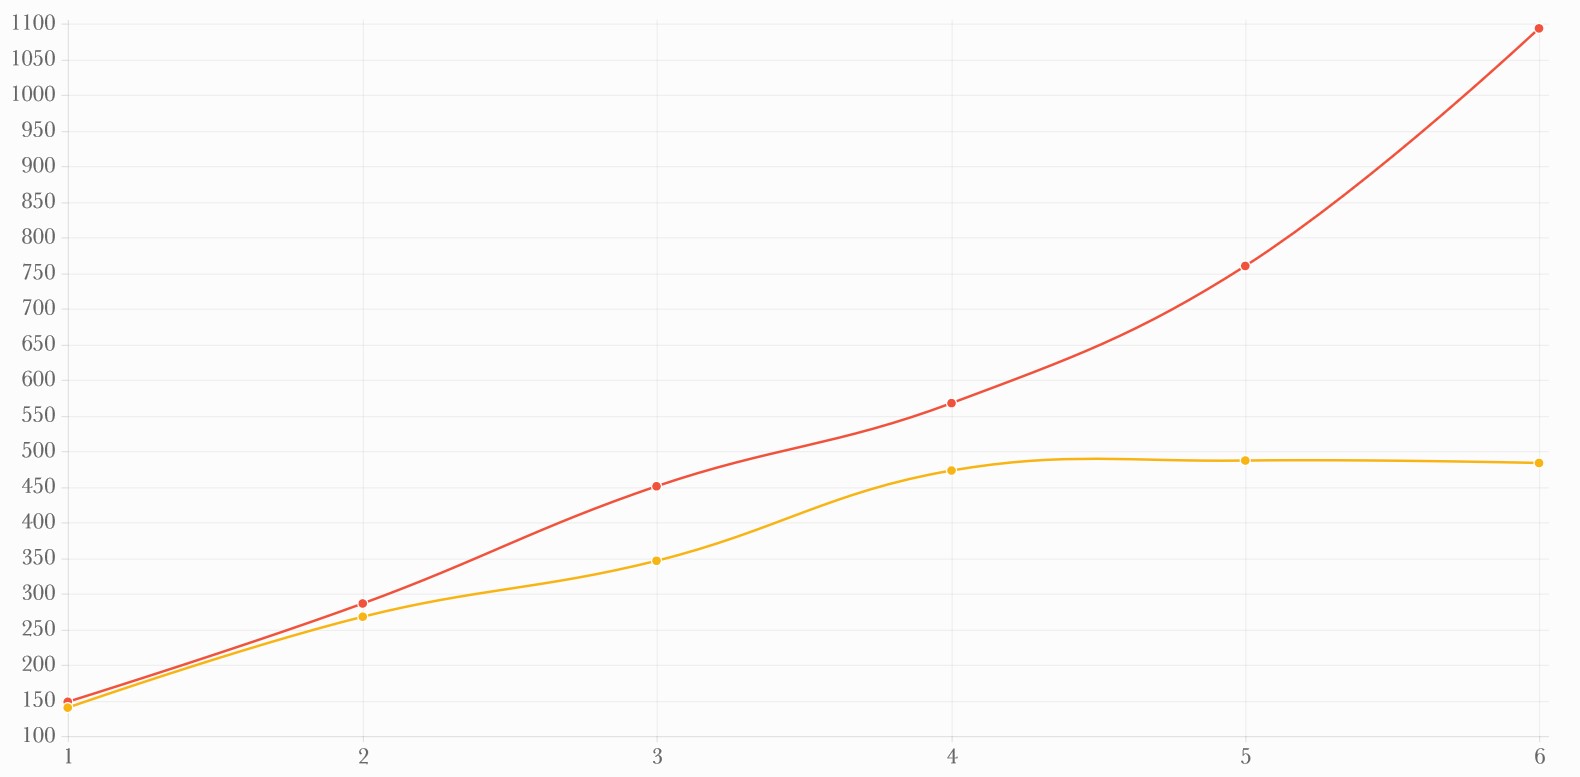
Whilst the scaling is impressivly linear for reads, the lack of redundancy provided ruled out this as a viable option for my NAS. In the future I’m going to be trying out alternatives to Storage Spaces to see how they compare. Im also looking at returning to storage spaces with a pair of SSD’s to act as cache to see if i can improve smaller size performance.
If you have any reccomendation or suggestions for other OS’es to try or things to test please let me know.